


Can You Cut LED Strip Lights? (Maxcio’s Specialists Have the Best Solutions for You)
If you're looking for information on how to cut LED strip lights, look no further than Maxcio's blog post. Our specialists have the best solutions...

Did you know that most LED strip lights can be cut and reconnected to suit your creative designs? That’s right, you don’t need to be an electrician to customize the lighting in your home, you don’t even need to be that handy either! LED strip lights are a highly customizable, inexpensive, and fun way to add a dose of modern functional, and decorative lighting to your space.
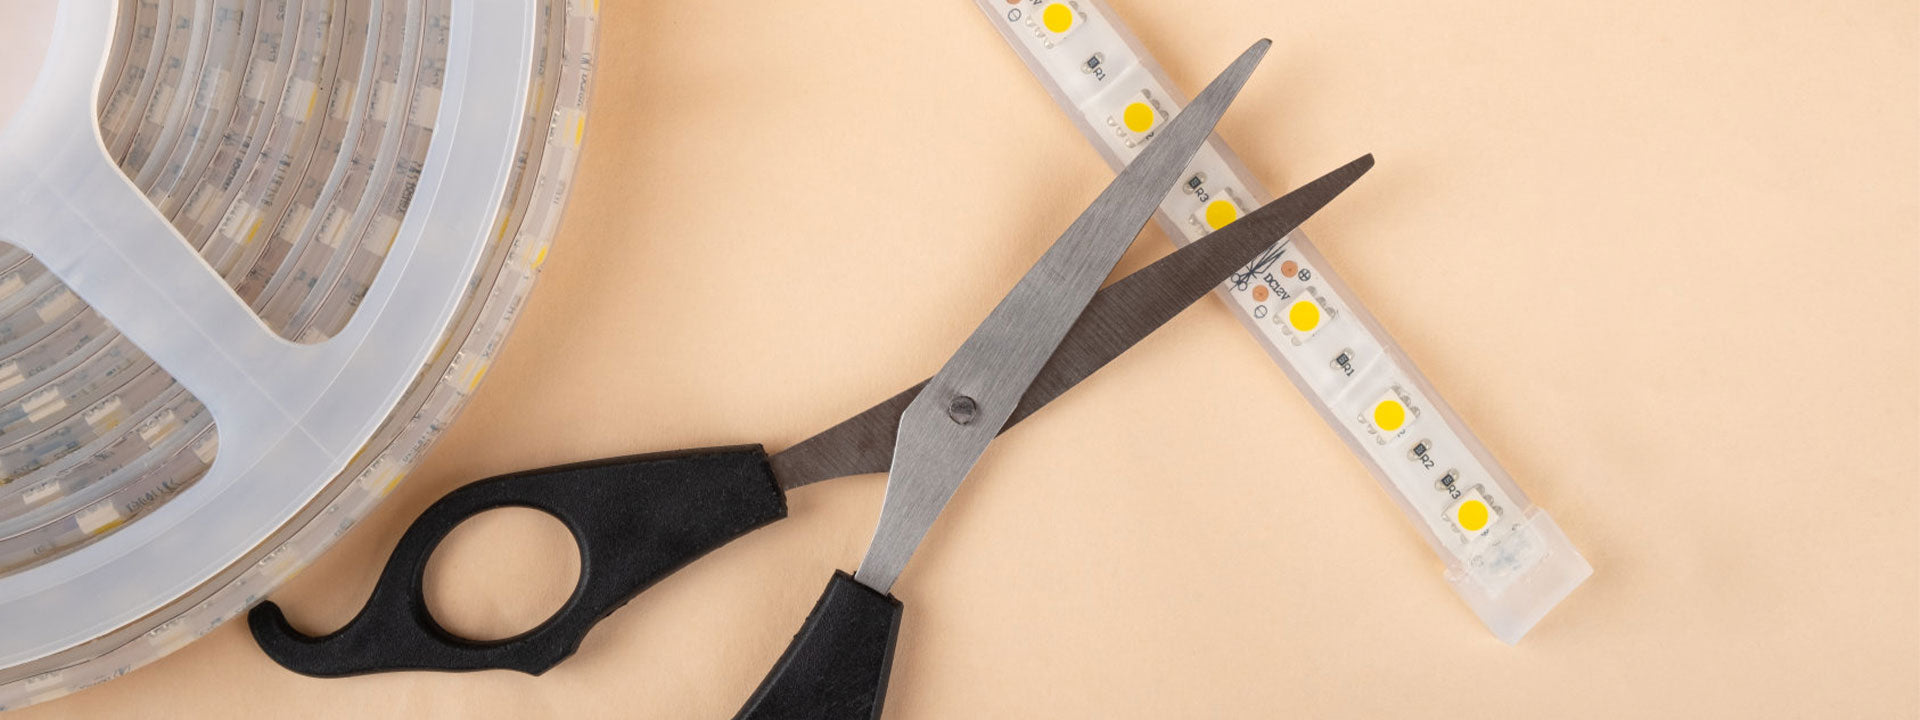
In this article, our specialists are going to break down how to safely cut your LED strip lights and how to reconnect them to take your LED DIY game to a whole other level, and just in time for the holidays, too! Get your LED strip spool and scissors ready and let’s get into it!
Can LED Strip Lights Be Cut?
You can cut some LED strip lights so long as you cut them accurately and in the correct location. LED strip lights are essentially long, flexible circuit boards with light-emitting diodes evenly spaced out along them. The circuits on an LED strip light end where you can see a series 2-4 - this is the spot at which it is safe to cut the LED strip light without breaking it. That being said, not all LED strip lights are designed to be cut; double-check the specs of the lights or get in touch with the manufacturer to make sure.
Can You Cut LED Strip Lights Anywhere?
LED DIY is pretty easy and really fun, but it must be understood that you cannot simply cut LED strip lights anywhere. As previously mentioned, LED strip lights are circuit boards; if you cut the LED strip light in a random position, you are effectively breaking its circuits, so the electrical current will not be able to power the LEDs.
Where to Cut LED Strip Lights
The only place on an LED strip light where it is safe to cut without breaking it is where the copper marking is located. These copper dots are the ending and beginnings of the circuits which power the LEDs on the strip. It is safe to cut these without breaking the entire LED strip if cut cleanly and accurately. Some LED strip lights show you exactly where to cut by indicating with a little scissors logo or cut mark. The cut line on LED lights will be located between a series of copper markings.
How to Cut LED Strip Lights Without Breaking Them
There are two ways to cut LED strip lights without breaking them. The first way is the safer method, but you will inevitably render one end of the strip unusable. This method is better for shortening an LED strip that is too long or if you just want to be extra careful about not breaking the section of the strip that you want to use. It’s also a good idea to use this method if your LED strip lights don’t have a cut line.
This safer method for cutting LED strip lights without breaking them goes as follows:
- Locate the copper section on the strip light nearest to the point at which you’d like to cut.
- Determine which end of the strip you’d like to keep and which you are okay with getting rid of.
- Use scissors to carefully cut along the copper dots closer to the end that you don’t want to keep. This will ensure that the electrical circuit of the section that you want to use will still work because there is enough copper to receive the electric current on the section of the strip that you want to keep.
- Test to make sure that it is working by plugging in the section that you want to keep.
The other method of cutting LED strips is to cut down the middle of the copper markings or along the cut line, indicated by a scissors logo. This method is better for extending and/or reconnecting sections of cut LED strips together.
For this method, it is very important to make an accurate cut right down the middle; otherwise, you might not leave enough copper on one side for a connector to work or for the circuit to function, effectively breaking the LED strip.
- Locate the copper section on the strip light nearest to the point at which you’d like to cut.
- If the copper markings at this point have a cut mark or scissors logo, use scissors to cut carefully and precisely along that line. If there isn’t a cut line, you’ll need to be extra careful to cut right down the middle so that both ends have the same amount of copper.
- Test to make sure that it is working by reconnecting the two sections with an LED strip connector and plug it in.

How to Reconnect Cut LED Strips
Once you’ve successfully cut your LED light strip, you can now reconnect them for the purpose of the extension, to join at a corner, and so many other purposes; you’re the designer and the sky is the limit when it comes to LED strip light DIY! Reconnecting cut LED strips is really easy, here are the 3 simple steps for how to reconnect cut LED strips:
- Select the type of connector you want to use (listed below).
- Locate where you cut the strip and peel back about 1 cm of the adhesive on the flex from where you made the cut. This will make the strip fit much better into the connector.
- Insert the cut end into the connector. Make sure you got all the copper dots completely in.
- Click the connector shut over the copper dots. If there is an LED close to the connection point, be extra careful not to use too much force when you close the connector so as not to crush the LED. If the locks in the side of the connector aren’t clicking shut, use needle nose pliers to gently lock them into place.
- Plug in and turn on the strip to see if it worked! If your lights aren’t turning on, there could be an issue with the cut or how you reconnected the strips, refer to the troubleshooting section at the end of this article.
Of course, in order to reconnect your cut LED strip lights, you’re going to need connectors. There are a few different types of connectors you can use and are as follows:
- Four pin connector - This is your standard LED straight connector that allows you to reconnect two cut LED strips. A four pin connector is best for connecting two long pieces of the LED strip for the purpose of extending your lights.
- T connector - T connectors have 3 points at which you can connect cut LED strips and are perfect for easy angle customization.
- Connector wire - A connection wire is essentially an extension of the power cord. You’ll need it if your power source outlet is out of reach from your LED strip light setup.
- L connector - An L connector is a 90-degree angle LED connector and is also known as a hippo clip. L connectors are great for reconnecting LED strips at a corner.
There are also a few ways to reconnect cut LED strips without connectors. Maybe you don’t have any connectors on hand, you want to practice your soldering skills, or you’re just a hardcore DIYer; whatever the case, here’s how you can reconnect LED strips without connectors.
How to Reconnect Cut LED Strips Without Connectors
To reconnect LED strips without connectors, you’ll need a soldering iron, solder, and positive and negative extension wires.
- Put some solder on each of the copper dots where you’ve made a cut.
- Make sure your extension wire has some exposed wiring, attach the positive wire (red) to the solder of the copper dot that has a plus sign, and attach the negative wire (black) to the solder of the copper dot that has a minus sign.
- Let the solder cool for a moment, then test out the connection. And that’s all there is to it!

Troubleshooting: Cut LED Strip Lights Not Working
If your cut LED strip lights aren’t working, it’s likely because of one of these reasons:
a) You didn’t cut the LED strip at the correct location. Remember, you can ONLY cut the flex where the copper markings are located. If you cut anywhere else, you will break the circuits and the electric current won’t be able to power the LEDs.
b) You cut off too much copper. You need to make sure that there is enough copper to receive the electric current and pass it on to another strip via a connector. Try to cut the strip so that there is about a millimetre of copper left.
c) Your lights are not designed to be cut. Indeed, many, but not all, LED strip lights are designed to be cut. Be sure to read the specs carefully or get in touch with the manufacturer.
d) If you have extended your strip lights by cutting and reconnecting them and some, but not all, lights are working, it could be an issue with your power supply. The power supply might not be strong enough to power the lights you’ve added to the strip, so you may need to buy a power cable with a slightly higher voltage.
e) If you forewent using connectors and took the soldering route, but your cut strip lights aren’t working, make sure that you connected the positive wire to the positive copper and the negative wire to the negative copper. Positive wires are usually red, and negatives are usually black. If they look good but still aren’t working you might need to redo the soldering or you might have one of the above issues.
And that’s all there is to cutting and reconnecting LED strip lights! Just to briefly summarize, you can cut many, but not all, LED strip lights - check the specs to be certain. When it comes to cutting your LED strip lights, remember that you can only cut where there’s a scissors logo or cut line, but if your lights don’t have those, you just need to be extra careful not to cut off too much copper when making the cut. Once you’ve cut your strip light, you can reconnect them by using either a connector or by soldering. If your LED strip lights won’t work after you’ve cut them, the most likely reasons could be that you either cut them in the wrong place or your lights weren’t designed to be cut. With all this in mind, we wish you success in your creative LED strip light projects! Good luck!